If you’re looking for quick, hearty, and delicious meals, ground beef is your go-to hero in the kitchen. Affordable, versatile, and packed with protein, ground beef can be transformed into comforting casseroles, spicy tacos, satisfying pastas, and so much more. Whether you’re feeding a family or just looking to meal prep for the week, these 10 ground beef recipes are guaranteed to please every palate.
From American classics to global flavors, here’s your ultimate list of ground beef dishes that are easy to make and full of flavor.
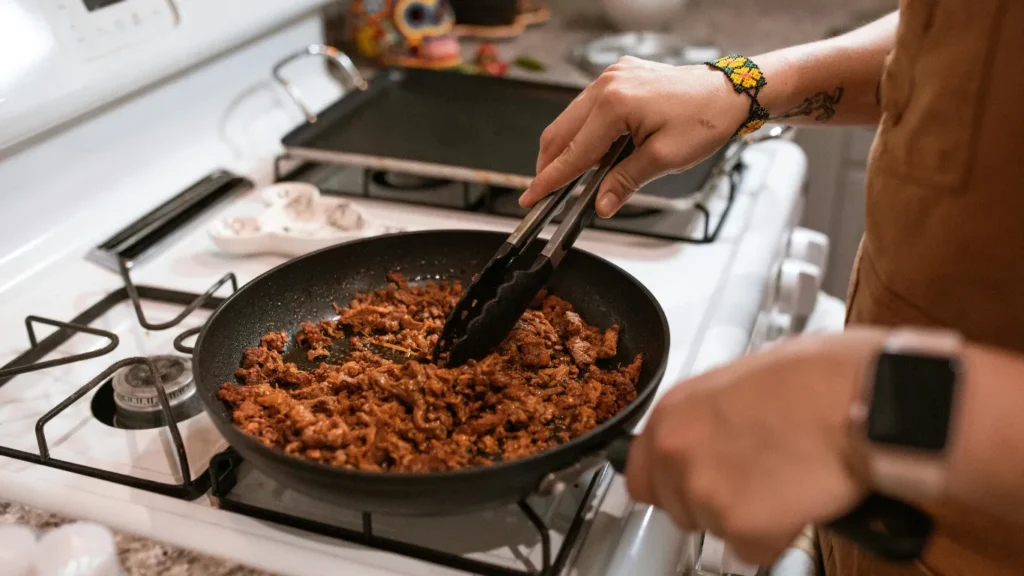
1. Classic Ground Beef Tacos
Why You’ll Love It: Quick, customizable, and kid-approved.
This weeknight dinner favorite takes just 20 minutes and can be served with your favorite toppings. Sauté ground beef with onions, garlic, taco seasoning, and a splash of tomato sauce for a moist, flavorful filling. Serve in crispy taco shells or warm tortillas, and top with shredded lettuce, cheese, salsa, and sour cream.
Pro Tip: Add black beans or corn to stretch the filling and boost fiber.
Prep Time: 10 minutes
Cook Time: 15 minutes
Total Time: 25 minutes
Servings: 4
Cuisine: Mexican-American
Course: Dinner, Main Course
Why You’ll Love This Recipe:
These classic ground beef tacos are a weeknight lifesaver—quick, flavorful, and easily customizable. The seasoned beef filling is juicy and savory, and you can pile on all your favorite toppings. Whether you use crunchy taco shells or soft flour tortillas, this recipe is guaranteed to become a staple in your kitchen.
10 Paris Brest Recipes: Indulge in the Perfect French Dessert Delight
📝 Ingredients:
For the Taco Filling:
- 1 lb (450g) ground beef (80/20 blend recommended)
- 1 small onion, finely chopped
- 2 cloves garlic, minced
- 2 tbsp tomato paste
- 2 tsp chili powder
- 1 tsp ground cumin
- 1 tsp smoked paprika
- ½ tsp dried oregano
- ¼ tsp cayenne pepper (optional for heat)
- Salt and black pepper to taste
- ½ cup water or beef broth
For Serving:
- 8 taco shells or small flour tortillas
- 1 cup shredded lettuce
- 1 cup shredded cheddar or Mexican cheese blend
- ½ cup diced tomatoes
- ½ cup sour cream
- Salsa or pico de gallo
- Fresh cilantro (optional)
- Lime wedges (optional)
👩🍳 Instructions:
Step 1: Brown the Beef
In a large skillet over medium-high heat, add ground beef. Break it apart with a spatula and cook until browned, about 5–6 minutes. Drain excess fat if needed.
Step 2: Add Onion and Garlic
Add chopped onion and cook for 2–3 minutes until softened. Stir in the minced garlic and cook for another 30 seconds until fragrant.
Step 3: Season the Meat
Add tomato paste, chili powder, cumin, paprika, oregano, cayenne, salt, and pepper. Stir well to coat the beef.
Step 4: Simmer
Pour in ½ cup of water or broth and let the mixture simmer for 5–7 minutes, until thickened. Taste and adjust seasoning as needed.
Step 5: Assemble the Tacos
Warm your taco shells or tortillas according to package instructions. Spoon the beef mixture into each shell and top with lettuce, cheese, tomatoes, sour cream, and your favorite garnishes.
💡 Tips and Variations:
- Stretch the filling: Add black beans, corn, or diced bell peppers to make the taco meat go further.
- Healthier twist: Swap ground beef for ground turkey or plant-based meat alternatives.
- Make it a taco bar: Serve toppings in small bowls and let everyone build their own tacos.
🌶️ Storage:
Leftover taco meat can be stored in an airtight container in the fridge for up to 4 days or frozen for up to 3 months.
2. Homestyle Meatloaf
Why You’ll Love It: A nostalgic comfort food classic.
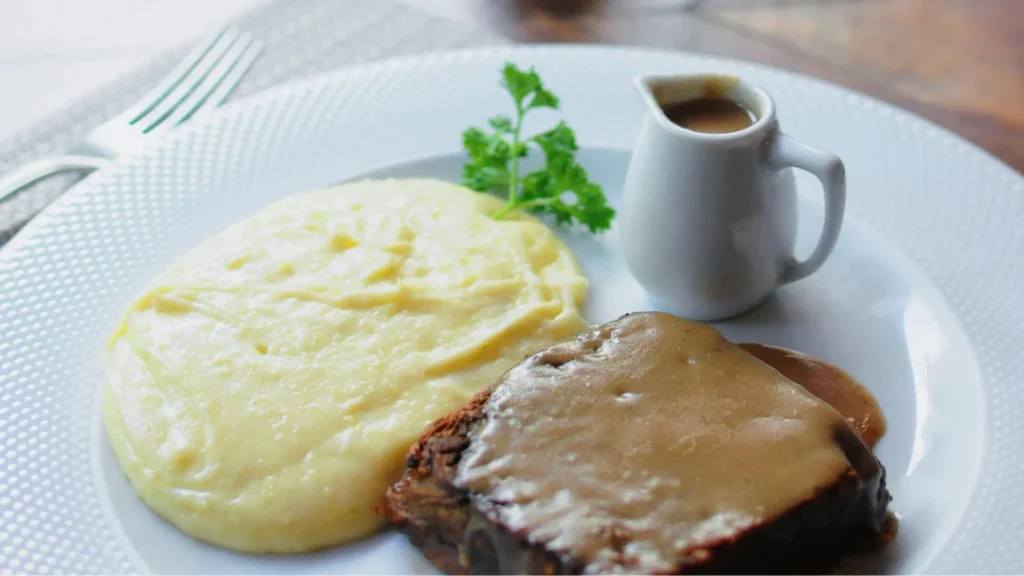
A juicy, tender meatloaf is a ground beef staple. Combine beef with breadcrumbs, onions, garlic, Worcestershire sauce, eggs, and ketchup. Form into a loaf and bake until golden, then glaze with a sweet-and-savory tomato topping. Serve with mashed potatoes and green beans for the ultimate comfort meal.
Pro Tip: Mix in a bit of milk-soaked bread for a more tender texture.
Prep Time: 15 minutes
Cook Time: 1 hour
Total Time: 1 hour 15 minutes
Servings: 6
Cuisine: American
Course: Dinner, Main Course
Why You’ll Love This Recipe:
This homestyle meatloaf is the ultimate comfort food—moist, flavorful, and glazed with a sweet and tangy ketchup topping. It’s a family-friendly dinner that pairs perfectly with mashed potatoes, green beans, or even a slice of toasted bread. Simple ingredients, easy prep, and leftovers that taste just as good the next day—this recipe is a keeper.
📝 Ingredients:
For the Meatloaf:
- 2 lbs (900g) ground beef (80/20 recommended)
- 1 small onion, finely chopped
- 2 cloves garlic, minced
- 1 cup breadcrumbs (plain or Italian)
- 2 large eggs
- ¾ cup whole milk
- 2 tbsp Worcestershire sauce
- ¼ cup ketchup
- 1 tsp salt
- ½ tsp black pepper
- 1 tsp dried thyme (optional)
For the Glaze:
- ½ cup ketchup
- 2 tbsp brown sugar
- 1 tbsp Dijon or yellow mustard
- 1 tsp apple cider vinegar (optional, for tang)
👩🍳 Instructions:
Step 1: Preheat Oven
Preheat your oven to 350°F (175°C). Line a baking sheet with parchment paper or lightly grease a loaf pan.
Step 2: Mix the Meatloaf
In a large mixing bowl, combine ground beef, chopped onion, garlic, breadcrumbs, eggs, milk, Worcestershire sauce, ketchup, salt, pepper, and thyme. Use clean hands or a spatula to mix until just combined—don’t overmix, or your meatloaf may become dense.
Step 3: Shape the Loaf
Transfer the mixture onto the prepared baking sheet and shape it into a loaf approximately 8 inches long and 4 inches wide. Alternatively, pack the mixture into a greased loaf pan.
Step 4: Bake the Meatloaf
Bake for 40 minutes.
Step 5: Add the Glaze
While the meatloaf bakes, mix together the ketchup, brown sugar, mustard, and vinegar in a small bowl. After 40 minutes, remove the meatloaf from the oven and brush the glaze generously over the top.
Step 6: Finish Baking
Return the meatloaf to the oven and bake for an additional 15–20 minutes, or until the internal temperature reaches 160°F (71°C).
Step 7: Rest and Serve
Let the meatloaf rest for 10 minutes before slicing. This helps retain juices and makes slicing easier.
🍴 Serving Suggestions:
- Classic pairing: Mashed potatoes and steamed green beans
- Lighter side: Roasted vegetables or a crisp garden salad
- Comfort twist: Serve a thick slice on toasted bread with extra glaze as a meatloaf sandwich
💡 Tips & Variations:
- Soak breadcrumbs in milk before mixing for a softer texture.
- Make it ahead: Assemble the meatloaf a day in advance and refrigerate; just bake when ready.
- Add-ins: Try mixing in grated carrots, chopped mushrooms, or shredded cheese.
- Gluten-free: Use gluten-free breadcrumbs or oats in place of regular breadcrumbs.
🌡️ Storage & Reheating:
- Fridge: Store leftovers in an airtight container for up to 4 days.
- Freezer: Wrap tightly and freeze for up to 3 months. Thaw overnight in the fridge before reheating.
- Reheat: Warm in the oven at 325°F or microwave individual slices until heated through.
3. Beef and Cheese Lasagna
Why You’ll Love It: Layers of cheesy, meaty goodness.
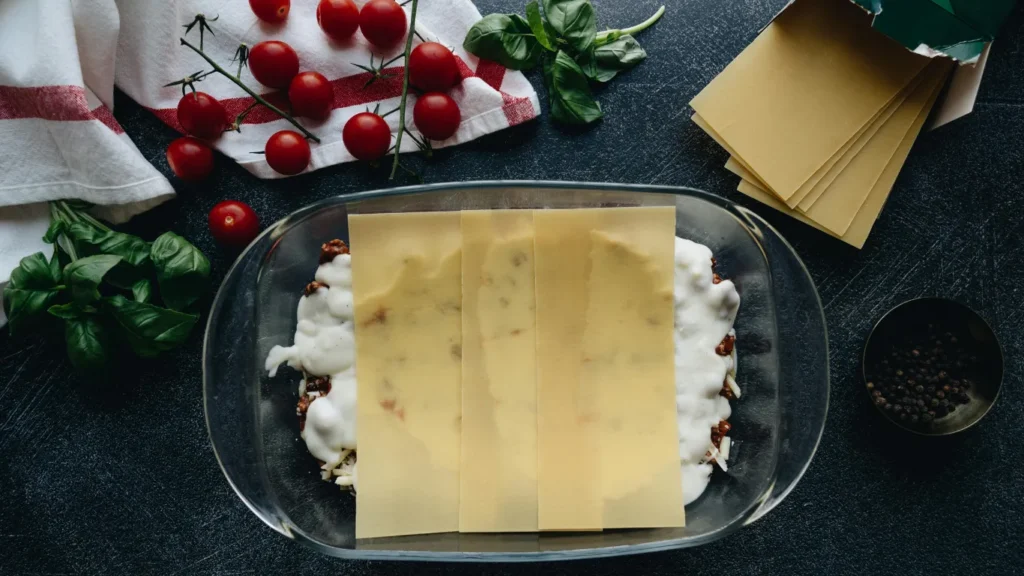
Ground beef makes a rich and savory meat sauce in this traditional Italian-American favorite. Layer the sauce with pasta sheets, ricotta cheese, mozzarella, and Parmesan. Bake until bubbly and golden on top. This is a fantastic make-ahead or freezer-friendly dish.
Pro Tip: Add a touch of red wine to the sauce for extra depth of flavor.
Prep Time: 25 minutes
Cook Time: 45 minutes
Total Time: 1 hour 10 minutes
Servings: 8
Cuisine: Italian-American
Course: Dinner, Main Course
Why You’ll Love This Recipe:
Beef and cheese lasagna is the ultimate comfort food—a hearty, layered dish full of rich meat sauce, creamy ricotta, melty mozzarella, and perfectly cooked pasta. Whether you’re feeding a crowd or meal-prepping for the week, this classic lasagna recipe never disappoints. It’s cozy, satisfying, and always a family favorite.
📝 Ingredients:
For the Meat Sauce:
- 1 tbsp olive oil
- 1 lb (450g) ground beef
- 1 small onion, finely chopped
- 3 cloves garlic, minced
- 1 can (28 oz) crushed tomatoes
- 2 tbsp tomato paste
- 1 tsp sugar (to balance acidity)
- 1 tsp dried basil
- 1 tsp dried oregano
- Salt and pepper to taste
- ½ tsp red pepper flakes (optional)
For the Cheese Layer:
- 15 oz (425g) ricotta cheese
- 1 large egg
- ½ cup grated Parmesan cheese
- Salt and pepper to taste
- 2 tbsp chopped parsley (optional)
For Assembly:
- 9 lasagna noodles (regular or no-boil)
- 3 cups shredded mozzarella cheese
- Extra Parmesan for topping
- Fresh basil or parsley for garnish (optional)
👩🍳 Instructions:
Step 1: Cook the Meat Sauce
In a large skillet or saucepan, heat olive oil over medium heat. Add the ground beef and brown until no longer pink. Drain excess fat. Add chopped onion and cook for 3–4 minutes. Stir in garlic and cook for another 30 seconds.
Add crushed tomatoes, tomato paste, sugar, basil, oregano, salt, pepper, and red pepper flakes. Simmer uncovered for 15–20 minutes until thickened. Stir occasionally.
Step 2: Cook the Lasagna Noodles (if needed)
If using regular lasagna noodles, cook them according to the package instructions. Drain and lay them flat on parchment or drizzle with olive oil to prevent sticking.
Step 3: Prepare the Ricotta Mixture
In a medium bowl, mix ricotta cheese with the egg, Parmesan, salt, pepper, and parsley. Stir until well combined and creamy.
Step 4: Assemble the Lasagna
Preheat your oven to 375°F (190°C).
In a 9×13 inch baking dish, spread a thin layer of meat sauce on the bottom. Layer 3 noodles on top. Spread ⅓ of the ricotta mixture over the noodles, then sprinkle with mozzarella, followed by more meat sauce. Repeat the layers two more times, finishing with meat sauce and a generous topping of mozzarella and Parmesan.
Step 5: Bake
Cover with foil (sprayed with oil to prevent sticking) and bake for 25 minutes. Remove foil and bake for an additional 20 minutes, until bubbly and golden brown on top.
Step 6: Rest and Serve
Let the lasagna rest for 10–15 minutes before slicing. Garnish with chopped parsley or basil, and serve with garlic bread or salad.
🍽️ Serving Suggestions:
- Classic pairing: Caesar salad or roasted vegetables
- Bread options: Garlic breadsticks, focaccia, or warm dinner rolls
- Wine pairing: A bold red like Chianti or Cabernet Sauvignon
💡 Tips & Variations:
- Make it ahead: Assemble the lasagna and refrigerate for up to 24 hours before baking.
- Freeze it: Assemble and freeze before baking (wrapped well), or freeze leftovers in portions.
- Vegetable boost: Add sautéed spinach, mushrooms, or zucchini between layers.
- Cheese swaps: Use cottage cheese instead of ricotta for a lighter version, or add provolone for extra flavor.
🌡️ Storage & Reheating:
- Fridge: Store in an airtight container for up to 4 days.
- Freezer: Freeze individual slices or the full dish (tightly wrapped) for up to 3 months.
- Reheat: Bake covered at 350°F or microwave individual portions until hot throughout.
4. One-Pot Ground Beef Stroganoff
Why You’ll Love It: Creamy, hearty, and made in just one pot.
A modern twist on the classic stroganoff, this version uses ground beef for speed without sacrificing flavor. Cooked with mushrooms, garlic, onions, and a creamy sour cream sauce, this dish comes together in under 30 minutes.
Pro Tip: Use egg noodles and fresh parsley for a traditional touch.
Prep Time: 10 minutes
Cook Time: 25 minutes
Total Time: 35 minutes
Servings: 4
Cuisine: American, Russian-inspired
Course: Dinner, Main Course
Why You’ll Love This Recipe:
This One-Pot Ground Beef Stroganoff is creamy, savory, and soul-warming—all made in a single pot with simple pantry staples. It’s a streamlined version of the classic beef stroganoff, swapping steak for ground beef to make it budget-friendly and weeknight-ready. Tender noodles, rich mushroom sauce, and tangy sour cream come together for a dish that feels fancy without the fuss.
📝 Ingredients:
- 1 tbsp olive oil or butter
- 1 lb (450g) ground beef
- 1 small onion, diced
- 2 cloves garlic, minced
- 8 oz (225g) mushrooms, sliced (white or cremini)
- 2 tbsp all-purpose flour
- 3 cups beef broth
- 1 tbsp Worcestershire sauce
- 1 tsp Dijon mustard (optional but recommended)
- 2 cups uncooked egg noodles
- Salt and pepper to taste
- ¾ cup sour cream
- Fresh parsley for garnish (optional)
👩🍳 Instructions:
Step 1: Sauté the Beef and Veggies
In a large skillet or Dutch oven, heat olive oil over medium-high heat. Add the ground beef and cook until browned, breaking it up with a spoon as it cooks. Drain excess fat if needed.
Add diced onion and cook for 2–3 minutes until softened. Stir in the garlic and mushrooms and cook until mushrooms are browned and tender, about 5 minutes.
Step 2: Add Flour and Liquid
Sprinkle the flour over the beef mixture and stir well to coat. This helps thicken the sauce. Cook for 1 minute, then gradually stir in the beef broth, Worcestershire sauce, and Dijon mustard. Scrape the bottom of the pan to loosen any browned bits (flavor!).
Step 3: Simmer with Noodles
Bring the mixture to a boil, then reduce heat to a simmer. Add the uncooked egg noodles and stir to combine. Cover and cook for about 10–12 minutes, stirring occasionally, until the noodles are tender and the sauce has thickened.
Step 4: Finish with Sour Cream
Once the noodles are cooked, turn off the heat. Stir in the sour cream until fully combined. Taste and adjust seasoning with salt and pepper.
Step 5: Garnish and Serve
Serve hot, garnished with chopped parsley for a pop of color. This dish is perfect on its own or paired with a green salad or steamed vegetables.
🍽️ Serving Suggestions:
- Side dish: Steamed green beans, roasted broccoli, or garlic bread
- Beverage pairing: A crisp white wine like Chardonnay or a light lager
- Add a salad: Try a simple cucumber-dill salad for a refreshing contrast
💡 Tips & Variations:
- No mushrooms? Omit them or substitute with zucchini or bell peppers.
- Make it richer: Add a splash of heavy cream with the sour cream for extra indulgence.
- Dairy-free: Use a dairy-free sour cream alternative and skip butter.
- Thicker sauce: Simmer uncovered for a few extra minutes before adding sour cream.
- More protein? Add frozen peas or spinach at the end for a nutritious boost.
🌡️ Storage & Reheating:
- Fridge: Store in an airtight container for up to 4 days.
- Freezer: Not ideal, as dairy-based sauces may separate—but can be frozen if needed.
- Reheat: Warm gently on the stovetop or microwave, adding a splash of broth or milk to loosen the sauce.
5. Korean Ground Beef Bowls
Why You’ll Love It: Quick, flavorful, and budget-friendly.
This sweet-and-savory stir-fry is made with soy sauce, garlic, brown sugar, and sesame oil. Served over rice and topped with green onions and sesame seeds, it’s an excellent weeknight meal packed with flavor.
Pro Tip: Add steamed broccoli or a fried egg for extra nutrition and texture.
Prep Time: 10 minutes
Cook Time: 15 minutes
Total Time: 25 minutes
Servings: 4
Cuisine: Korean-inspired
Course: Dinner, Lunch, Meal Prep
Why You’ll Love This Recipe:
These Korean Ground Beef Bowls are the ultimate weeknight winner: sweet, savory, and packed with umami flavor. Made with pantry staples and ready in under 30 minutes, this dish turns humble ground beef into a bold and satisfying meal. Serve it over steamed rice with fresh toppings like green onions, sesame seeds, and a runny egg for an irresistible, restaurant-style experience at home.
📝 Ingredients:
For the Beef:
- 1 lb (450g) ground beef
- 1 tbsp sesame oil
- 3 cloves garlic, minced
- 1-inch piece of ginger, grated (or 1 tsp ground ginger)
- ¼ cup soy sauce (low sodium preferred)
- 2 tbsp brown sugar (or honey)
- 1 tbsp gochujang (Korean chili paste) or ½ tsp red pepper flakes
- 1 tbsp rice vinegar (optional for balance)
- 2 green onions, chopped
- Salt and black pepper to taste
For Serving:
- 2 cups cooked white or brown rice
- Steamed broccoli or mixed vegetables
- Fried or soft-boiled egg (optional)
- Sesame seeds
- Additional sliced green onions
- Kimchi (optional for authentic flavor)
👩🍳 Instructions:
Step 1: Brown the Beef
Heat sesame oil in a large skillet over medium-high heat. Add the ground beef and cook until browned, breaking it up with a wooden spoon. Drain excess fat if needed.
Step 2: Add Aromatics and Sauce
Stir in garlic and ginger and sauté for 1–2 minutes until fragrant. Add soy sauce, brown sugar, gochujang (or red pepper flakes), and rice vinegar. Stir well and let the sauce simmer for 3–5 minutes until slightly thickened and the beef is fully coated.
Step 3: Finish with Green Onions
Stir in chopped green onions and cook for 1 more minute. Taste and adjust seasoning if needed.
Step 4: Assemble the Bowls
Scoop warm rice into bowls, top with the Korean-style ground beef, and add steamed veggies, a fried egg, sesame seeds, and more green onions. Add kimchi or sriracha for extra kick.
🍽️ Serving Suggestions:
- Traditional touch: Serve with kimchi and a drizzle of sesame oil
- Vegetarian twist: Use plant-based crumbles or tofu
- Low-carb version: Swap rice for cauliflower rice or lettuce wraps
💡 Tips & Variations:
- Meal prep winner: Store in individual containers with rice and veggies for easy weekday lunches.
- Spice level: Adjust heat with more or less gochujang or red pepper flakes.
- Budget-friendly: Substitute with ground turkey or chicken.
- Add crunch: Top with shredded carrots, cucumbers, or crushed peanuts.
🌡️ Storage & Reheating:
- Fridge: Store in airtight containers for up to 4 days.
- Freezer: Freeze cooked beef for up to 2 months. Thaw overnight in the fridge.
- Reheat: Microwave or reheat in a skillet with a splash of water or broth
6. Stuffed Bell Peppers with Ground Beef
Why You’ll Love It: Healthy and delicious with built-in portion control.
Bell peppers make the perfect edible vessel for a mixture of ground beef, rice, tomato sauce, and cheese. Bake until the peppers are tender and the cheese is melted and bubbly.
Pro Tip: Use quinoa instead of rice for a protein boost.
Prep Time: 15 minutes
Cook Time: 45 minutes
Total Time: 1 hour
Servings: 4–6
Cuisine: American, Mediterranean-inspired
Course: Dinner, Main Course
Why You’ll Love This Recipe:
Stuffed bell peppers with ground beef are colorful, wholesome, and satisfying. This recipe combines seasoned beef, rice, tomato sauce, and melted cheese inside naturally sweet bell peppers. Not only is it a nutritious meal with built-in portion control, but it’s also a crowd-pleaser that’s easy to prep ahead. Bonus: it’s naturally gluten-free and great for meal prep!
📝 Ingredients:
For the Peppers:
- 4 to 6 large bell peppers (any color), tops cut off and seeds removed
For the Filling:
- 1 lb (450g) ground beef
- 1 tbsp olive oil
- 1 small onion, diced
- 2 cloves garlic, minced
- 1 cup cooked white or brown rice
- 1 cup canned diced tomatoes (drained) or tomato sauce
- 2 tbsp tomato paste
- 1 tsp dried oregano
- ½ tsp smoked paprika
- Salt and pepper to taste
- ½ cup shredded cheese (cheddar, mozzarella, or your choice)
For Topping:
- ½ cup shredded cheese
- Fresh parsley or basil for garnish (optional)
👩🍳 Instructions:
Step 1: Prepare the Peppers
Preheat your oven to 375°F (190°C). Slice the tops off the bell peppers and remove seeds and membranes. Lightly oil a baking dish and place peppers upright in the dish.
Optional: For softer peppers, pre-bake them uncovered for 10 minutes before stuffing.
Step 2: Cook the Beef Filling
In a large skillet, heat olive oil over medium heat. Add diced onion and cook until soft (about 3 minutes). Stir in garlic and cook another 30 seconds.
Add ground beef and cook until browned, breaking it up with a spoon. Drain excess fat.
Stir in cooked rice, diced tomatoes (or tomato sauce), tomato paste, oregano, paprika, salt, and pepper. Let simmer for 5–7 minutes until well combined and slightly thickened.
Remove from heat and stir in ½ cup of shredded cheese.
Step 3: Stuff the Peppers
Spoon the beef and rice mixture into each bell pepper, filling to the top. Sprinkle the remaining cheese over each one.
Step 4: Bake
Cover the baking dish with foil and bake for 30 minutes. Remove foil and bake uncovered for another 10–15 minutes, until cheese is melted and bubbly.
Step 5: Garnish and Serve
Remove from oven, sprinkle with chopped fresh parsley or basil, and serve warm.
🍽️ Serving Suggestions:
- Classic pairing: Side salad or garlic bread
- Low-carb option: Use cauliflower rice in the filling
- Extra sauce: Serve with marinara or tomato sauce on the side
💡 Tips & Variations:
- Make ahead: Stuff peppers and refrigerate for up to 24 hours before baking.
- More veggies: Add spinach, zucchini, or corn to the filling.
- Cheese alternatives: Use feta, pepper jack, or dairy-free cheese.
- Freezer-friendly: Assemble and freeze before baking, or freeze fully baked peppers for quick future meals.
🌡️ Storage & Reheating:
- Fridge: Store in an airtight container for up to 4 days.
- Freezer: Freeze stuffed peppers individually in airtight containers for up to 3 months.
- Reheat: Microwave or bake at 350°F until heated through (cover with foil to avoid drying)
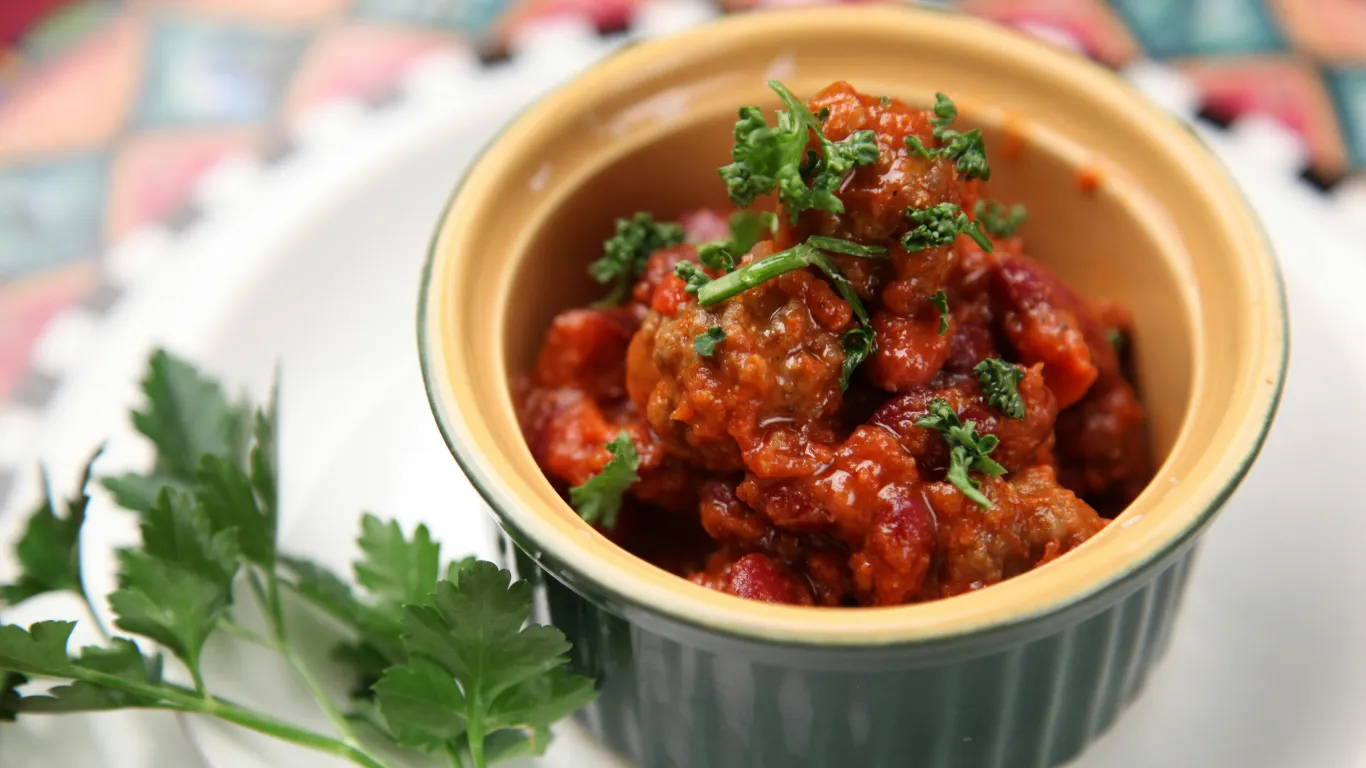
7. Beef Chili Con Carne
Why You’ll Love It: Spicy, rich, and perfect for cozy evenings.

Made with ground beef, kidney beans, tomatoes, and a bold mix of spices like cumin and chili powder, this chili is a crowd-pleaser. Let it simmer slowly to develop rich, deep flavors. Perfect for game day or cold nights.
Pro Tip: Serve with cornbread or tortilla chips on the side.
Prep Time: 15 minutes
Cook Time: 1 hour (or longer for deeper flavor)
Total Time: 1 hour 15 minutes
Servings: 6
Cuisine: Tex-Mex, American
Course: Dinner, Main Course
Why You’ll Love This Recipe:
Beef Chili Con Carne is bold, hearty, and packed with flavor. This one-pot meal is made with ground beef, kidney beans, tomatoes, and a blend of warming spices. It’s the ultimate comfort food—perfect for cold nights, casual gatherings, or meal prep. Whether you like it mild or spicy, this chili recipe is incredibly flexible and always satisfying.
📝 Ingredients:
- 1 tbsp olive oil
- 1 large onion, diced
- 1 green or red bell pepper, chopped
- 2 cloves garlic, minced
- 1 lb (450g) ground beef
- 2 tbsp tomato paste
- 1 can (15 oz) kidney beans, drained and rinsed
- 1 can (14.5 oz) diced tomatoes
- 1 can (8 oz) tomato sauce
- 1 cup beef broth or water
- 2 tsp ground cumin
- 2 tbsp chili powder (adjust to taste)
- 1 tsp smoked paprika
- ½ tsp ground oregano
- Salt and black pepper to taste
- ¼ tsp cayenne pepper (optional, for extra heat)
Optional Toppings:
- Shredded cheddar cheese
- Sour cream or Greek yogurt
- Diced red onion
- Sliced jalapeños
- Fresh cilantro
- Tortilla chips or cornbread on the side
👩🍳 Instructions:
Step 1: Sauté Aromatics
In a large pot or Dutch oven, heat olive oil over medium heat. Add diced onion and bell pepper. Sauté for 4–5 minutes until softened. Add minced garlic and cook another 30 seconds.
Step 2: Brown the Beef
Add ground beef to the pot. Cook until browned, breaking it up with a spoon. Drain excess fat if necessary.
Step 3: Build the Flavor
Stir in tomato paste and cook for 1–2 minutes. Add chili powder, cumin, paprika, oregano, salt, pepper, and cayenne. Stir to coat the beef evenly with spices.
Step 4: Add Tomatoes and Beans
Pour in diced tomatoes, tomato sauce, kidney beans, and beef broth. Stir well and bring to a simmer.
Step 5: Simmer Low and Slow
Reduce heat to low and cover loosely. Simmer for 45 minutes to an hour, stirring occasionally. The longer it simmers, the deeper the flavor. If it thickens too much, add a splash of water or broth.
Step 6: Taste and Serve
Taste and adjust seasoning as needed. Serve hot with your favorite toppings and sides.
🍽️ Serving Suggestions:
- Classic: Over white rice or with cornbread
- Low-carb: Serve with cauliflower rice or in lettuce cups
- Party-style: Make a chili bar with toppings and chips
- Leftovers: Use as a filling for burritos, nachos, or chili dogs
💡 Tips & Variations:
- Spice it up: Use chipotle powder or fresh chopped jalapeños.
- Add veggies: Corn, zucchini, or carrots make great additions.
- No beans? Try black beans, pinto beans, or skip them for a low-carb chili.
- Thicker chili: Simmer uncovered the last 10–15 minutes.
- Slow cooker method: Brown the beef first, then transfer everything to a slow cooker and cook on low for 6–8 hours.
🌡️ Storage & Reheating:
- Fridge: Store in airtight containers for up to 5 days.
- Freezer: Freeze in meal-sized portions for up to 3 months.
- Reheat: Warm on the stove or microwave with a splash of broth.
8. Sloppy Joes
Why You’ll Love It: Sweet, tangy, and fun to eat.
Sloppy Joes are a nostalgic sandwich made by simmering ground beef in a tangy tomato sauce and serving it on soft buns. Ready in under 30 minutes, they’re perfect for busy weeknights or casual gatherings.
Pro Tip: Toast the buns to keep them from getting too soggy.
Prep Time: 10 minutes
Cook Time: 20 minutes
Total Time: 30 minutes
Servings: 4–6
Cuisine: American
Course: Dinner, Lunch, Sandwiches
Why You’ll Love This Recipe:
Sloppy Joes are the ultimate comfort food—sweet, tangy, saucy ground beef piled onto soft sandwich buns. They’re quick to make, kid-approved, and perfect for busy weeknights or casual get-togethers. This homemade version tastes way better than the canned stuff and can easily be doubled or tripled for a crowd!
📝 Ingredients:
- 1 tbsp olive oil
- 1 lb (450g) ground beef
- ½ medium onion, finely chopped
- ½ green bell pepper, diced (optional)
- 2 cloves garlic, minced
- ¾ cup ketchup
- 2 tbsp tomato paste
- 1 tbsp Worcestershire sauce
- 1 tbsp brown sugar (adjust to taste)
- 1 tsp yellow mustard
- ½ tsp smoked paprika
- Salt and black pepper to taste
- ½ cup water (as needed to loosen the sauce)
- 4–6 hamburger buns, toasted
Optional Toppings:
- Shredded cheddar cheese
- Pickles or jalapeños
- Coleslaw
- Crispy onions
👩🍳 Instructions:
Step 1: Cook the Ground Beef
In a large skillet, heat olive oil over medium-high heat. Add ground beef and cook until browned, about 5–7 minutes, breaking it up with a spoon. Drain excess fat.
Step 2: Add Veggies and Aromatics
Stir in the chopped onion, green pepper (if using), and garlic. Cook for another 3–4 minutes until vegetables are soft and fragrant.
Step 3: Make It Sloppy
Add ketchup, tomato paste, Worcestershire sauce, brown sugar, mustard, paprika, salt, and pepper. Stir everything together, then add a splash of water to loosen the sauce if needed.
Step 4: Simmer the Sauce
Reduce heat and let the mixture simmer uncovered for 10–15 minutes, stirring occasionally. The sauce should be thick and glossy.
Step 5: Serve on Buns
Scoop a generous portion of sloppy joe filling onto each toasted bun. Add optional toppings, then close the sandwich and dig in!
🍽️ Serving Suggestions:
- Sides: Serve with potato chips, fries, or a simple green salad
- On the go: Pack leftovers in a thermos or wrap in foil for easy lunches
- Make it a bar: Set up a DIY sloppy joe bar with various toppings for a fun party idea
💡 Tips & Variations:
- Lean meat: You can use ground turkey or chicken for a lighter version
- Make it spicy: Add sriracha, cayenne, or chipotle in adobo
- Low-carb: Serve the filling in lettuce wraps or over roasted veggies
- Add-ins: Grated carrots or zucchini can bulk up the sauce with extra nutrition
🌡️ Storage & Reheating:
- Fridge: Store leftover meat in an airtight container for up to 4 days
- Freezer: Freeze sloppy joe filling for up to 3 months
- Reheat: Warm on the stove or in the microwave, adding a bit of water or broth to refresh the sauce
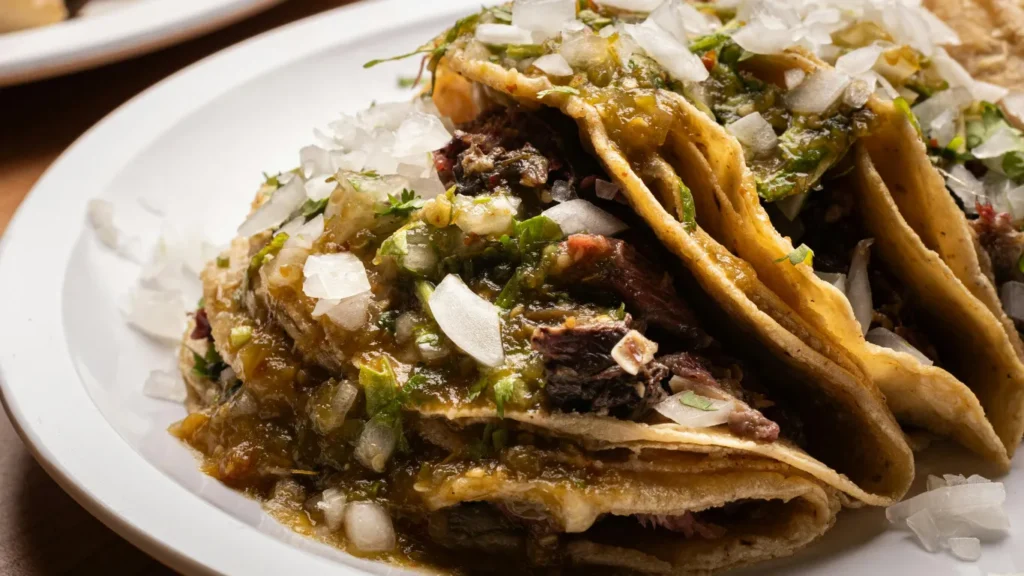
9. Ground Beef Quesadillas
Why You’ll Love It: Crispy, cheesy, and packed with flavor.
Sauté ground beef with onions, garlic, and spices, then layer into a tortilla with cheese and griddle until golden. Slice and serve with salsa, guacamole, or sour cream. Great for lunch, snacks, or even dinner.
Pro Tip: Add some jalapeños or bell peppers for an extra kick.
Prep Time: 10 minutes
Cook Time: 15 minutes
Total Time: 25 minutes
Servings: 4
Cuisine: Mexican-American
Course: Lunch, Dinner, Snack
Why You’ll Love This Recipe:
These Ground Beef Quesadillas are crispy on the outside, gooey on the inside, and loaded with flavor. They come together in under 30 minutes with basic pantry ingredients, making them perfect for busy weeknights or a satisfying lunch. Cheesy, customizable, and crowd-pleasing—what’s not to love?
📝 Ingredients:
For the Filling:
- 1 lb (450g) ground beef
- 1 tbsp olive oil
- 1 small onion, finely diced
- 2 cloves garlic, minced
- 1 tsp chili powder
- 1 tsp cumin
- ½ tsp smoked paprika
- Salt and black pepper to taste
- ½ cup tomato sauce or salsa (optional for extra flavor)
- 1 cup shredded cheddar, Monterey Jack, or Mexican cheese blend
For Assembly:
- 4 large flour tortillas
- Butter or oil, for greasing the skillet
- Optional: sour cream, guacamole, salsa, jalapeños for serving
👩🍳 Instructions:
Step 1: Cook the Ground Beef
Heat olive oil in a skillet over medium heat. Add ground beef and cook until browned, breaking it apart with a spoon. Drain excess fat if needed.
Add diced onion and cook for 2–3 minutes. Stir in garlic, chili powder, cumin, paprika, salt, and pepper. Add tomato sauce or salsa if using and simmer for 2–3 minutes until thickened.
Step 2: Prepare the Quesadillas
Lay a tortilla flat and sprinkle cheese over half. Add a spoonful of the beef mixture on top of the cheese. Fold the tortilla in half to form a half-moon shape. Repeat with remaining tortillas.
Step 3: Cook Until Crispy
Heat a non-stick skillet or griddle over medium heat and lightly grease with butter or oil. Place one quesadilla in the skillet and cook for 2–3 minutes per side, or until golden brown and crispy with melted cheese inside.
Transfer to a cutting board, let cool for a minute, then slice into wedges. Repeat with remaining quesadillas.
Step 4: Serve and Enjoy
Serve warm with your favorite dips—sour cream, guacamole, or salsa. Add jalapeños or hot sauce for an extra kick!
🍽️ Serving Suggestions:
- Complete the meal: Pair with Mexican rice, refried beans, or a crisp salad
- Party platter: Slice smaller and serve as appetizers
- Lunchbox tip: Let them cool slightly before packing to avoid sogginess
💡 Tips & Variations:
- Add veggies: Sautéed bell peppers, mushrooms, or corn go great in the filling
- Make it spicy: Add chopped jalapeños, chipotle powder, or hot sauce
- Use leftovers: Repurpose taco filling, chili, or shredded chicken
- Low-carb option: Use low-carb tortillas or lettuce wraps
🌡️ Storage & Reheating:
- Fridge: Store leftovers in the fridge for up to 3 days
- Freezer: Freeze cooled, wrapped quesadillas for up to 2 months
- Reheat: Warm in a skillet or oven for best crispiness (avoid microwaving, or do it briefly)
10. Shepherd’s Pie with Ground Beef
Why You’ll Love It: A comforting casserole for chilly days.

Traditionally made with lamb, this version swaps in ground beef for a family-friendly twist. Sauté with onions, carrots, and peas, then top with creamy mashed potatoes and bake until golden.
Pro Tip: Use Yukon gold potatoes for an extra buttery mash.
Prep Time: 20 minutes
Cook Time: 30 minutes
Total Time: 50 minutes
Servings: 6
Cuisine: British-inspired
Course: Dinner, Main Course
Why You’ll Love This Recipe:
This Shepherd’s Pie with Ground Beef is a cozy, comforting classic that’s easy to make and full of savory flavor. It swaps traditional lamb for ground beef, making it a more accessible and family-friendly version. With layers of seasoned beef and vegetables under a blanket of creamy mashed potatoes, this dish is perfect for chilly nights or anytime you need a hearty, satisfying meal.
📝 Ingredients:
For the Beef Filling:
- 1 tbsp olive oil
- 1 lb (450g) ground beef
- 1 small onion, diced
- 2 cloves garlic, minced
- 1 cup carrots, diced
- ½ cup frozen peas
- ½ cup frozen corn (optional)
- 2 tbsp tomato paste
- 1 tbsp Worcestershire sauce
- 1 tsp dried thyme
- 1 tsp dried rosemary
- Salt and pepper to taste
- ¾ cup beef broth or stock
- 1 tbsp flour or cornstarch (optional, for thickening)
For the Mashed Potato Topping:
- 2 lbs (900g) potatoes, peeled and cubed
- ¼ cup milk (more as needed)
- 3 tbsp butter
- Salt and pepper to taste
- Optional: ½ cup shredded cheddar cheese
👩🍳 Instructions:
Step 1: Boil the Potatoes
Place potatoes in a large pot of salted water. Bring to a boil and cook for 12–15 minutes or until fork-tender. Drain well.
Mash with butter, milk, salt, and pepper until smooth and creamy. Add more milk as needed for desired texture. Set aside.
Step 2: Make the Beef Filling
While the potatoes are boiling, heat olive oil in a large skillet over medium heat. Add ground beef and cook until browned. Drain excess fat if needed.
Stir in onion, garlic, carrots, and cook for 3–4 minutes until slightly softened. Add tomato paste, Worcestershire sauce, herbs, salt, and pepper. Mix well.
Pour in beef broth and simmer for 5–7 minutes. Add peas and corn. For a thicker filling, stir in 1 tbsp flour or cornstarch mixed with a little cold water and simmer until thickened.
Step 3: Assemble the Shepherd’s Pie
Preheat your oven to 400°F (200°C).
Spoon the beef filling into a greased baking dish (9×9 or similar size). Spread the mashed potatoes over the top evenly. Use a fork to make decorative ridges if desired.
Optional: Sprinkle shredded cheese over the potatoes for a golden, cheesy crust.
Step 4: Bake
Bake for 20–25 minutes until the top is golden and the edges are bubbling. If desired, broil for the last 2–3 minutes to brown the top.
Step 5: Cool and Serve
Let rest for 5–10 minutes before serving. Garnish with fresh parsley if desired.
🍽️ Serving Suggestions:
- With: A crisp green salad or roasted green beans
- For leftovers: Serve with gravy or turn into mini pies using ramekins
- Comfort twist: Pair with a rich brown ale or red wine
💡 Tips & Variations:
- Make it ahead: Assemble fully and refrigerate, then bake when ready
- Freezer-friendly: Freeze before or after baking; reheat in the oven at 375°F
- Lighter version: Use cauliflower mash instead of potatoes
- Add richness: Stir a spoonful of sour cream or cream cheese into the mashed potatoes
- Vegetarian: Use lentils or plant-based crumbles and veggie broth
🌡️ Storage & Reheating:
- Fridge: Store in an airtight container for up to 4 days
- Freezer: Wrap well and freeze for up to 3 months
- Reheat: Bake at 350°F until hot throughout or microwave individual portions
Ground Beef Cooking Tips
To make the most of these recipes, here are some handy tips for cooking with ground beef:
- Drain Excess Fat: After browning, drain excess grease to avoid soggy dishes.
- Use the Right Fat Ratio: An 80/20 mix (meat to fat) offers the best balance of flavor and texture.
- Season Well: Ground beef benefits from bold spices and seasoning. Don’t be afraid to add garlic, onion powder, cumin, paprika, or chili flakes.
- Don’t Overcook: Especially in dishes like meatloaf or burgers—overcooking can dry out the meat.
- Batch Cook and Freeze: Cook extra ground beef and freeze in portions for quick meals during the week.
Final Thoughts
These 10 ground beef recipes prove just how adaptable and essential this humble ingredient is in the kitchen. Whether you’re craving spicy tacos, cheesy pasta bakes, or a rich bowl of chili, ground beef delivers satisfying, delicious meals every time. With a little creativity, you can make ground beef the star of your weekly menu.
So next time you’re wondering what to do with that pack of ground beef in your fridge—refer back to this list and cook something amazing!
FAQs
Q: Can I use ground turkey instead of ground beef?
Yes, ground turkey can be substituted in most of these recipes for a leaner option, though you may need to increase seasoning to match the flavor.
Q: How long can cooked ground beef last in the fridge?
Cooked ground beef can be stored in an airtight container in the refrigerator for up to 4 days.
Q: Can I freeze any of these recipes?
Yes! Dishes like lasagna, chili, and shepherd’s pie freeze very well. Store in freezer-safe containers for up to 3 months.