Owning an RV opens the door to adventure and freedom—but protecting it from harsh weather conditions, sun damage, and debris is just as important as planning your next trip. However, not everyone can afford a fully enclosed RV garage or a professionally built structure. The good news? There are plenty of budget-friendly solutions that can shield your RV without emptying your wallet.
1. Tarp and Frame Shelter

1. Tarp and Frame Shelter
Cost Range: $100–$300
Best For: Quick, temporary, and ultra-budget-friendly RV protection
A tarp and frame shelter is the simplest and most cost-effective RV shelter you can build. This DIY structure uses a sturdy frame—typically made from PVC, EMT conduit, or basic lumber—covered with a heavy-duty, UV-resistant tarp to shield your RV from sun, rain, and debris. It’s a perfect short-term solution or emergency cover when you’re in a pinch.
Ideal for backyard storage or road trip stopovers, tarp and frame shelters can be built in various sizes and shapes, depending on your RV dimensions and available space.
How to Build:
- Build a frame using PVC pipes, metal conduit, or wood posts in a rectangular or A-frame shape.
- Drape a weatherproof tarp over the top, extending down the sides.
- Secure the tarp with bungee cords, ropes, or zip ties.
- Anchor the frame using stakes, sandbags, or concrete blocks to prevent wind damage.
Pros:
- Extremely low cost
- Simple to build and customize
- Portable and easy to disassemble
- Good for temporary or emergency use
Cons:
- Less durable in high wind or snow
- Tarp may degrade over time
- Requires regular maintenance and replacement
A tarp and frame shelter is a great entry-level option for RV owners on a tight budget. While it won’t provide the long-term durability of metal or wood shelters, it’s an accessible, DIY-friendly solution that offers essential protection when you need it most.
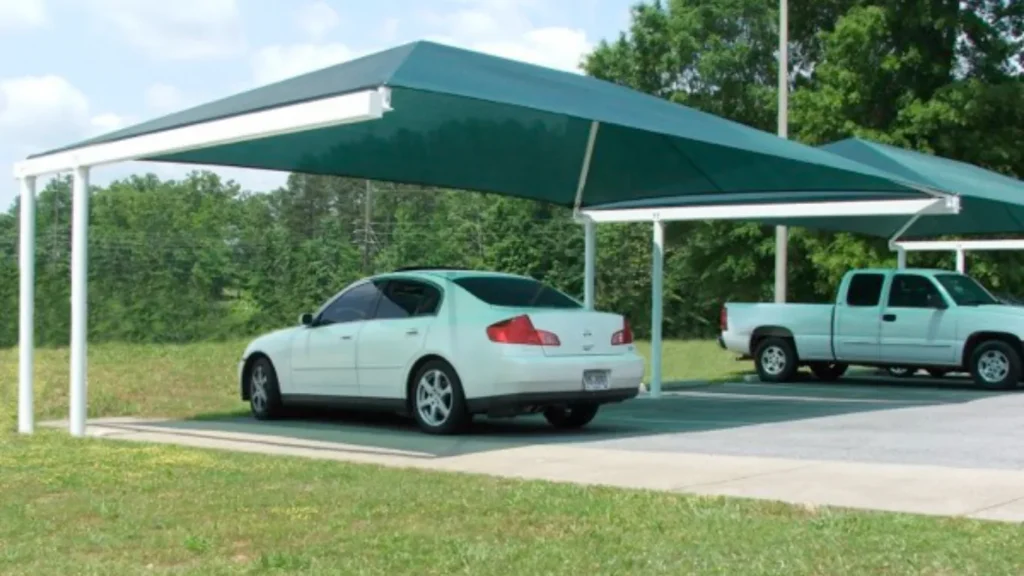
2. Carport Kit
2. Carport Kit
Cost Range: $500–$1500
Best For: Homeowners seeking a semi-permanent and durable RV shelter
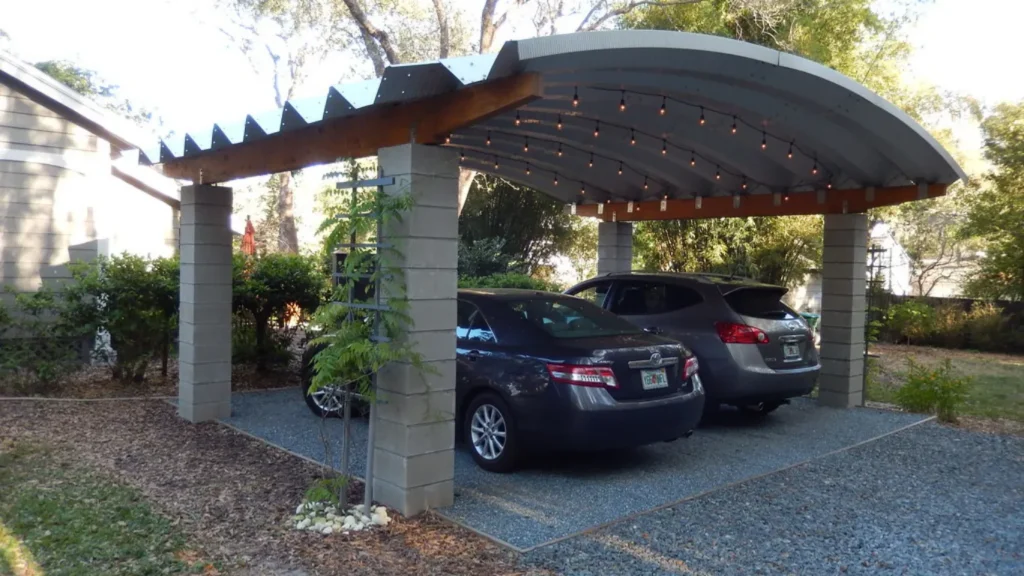
A carport kit is one of the most popular and practical solutions for RV protection on a budget. These prefabricated kits come with everything you need—a metal frame and roofing panels, usually made from galvanized steel or aluminum. Designed for easy assembly, carport kits are available in a wide range of sizes and can often be customized to fit your RV’s length and height.
Some models include optional side panels, anchors, and gutters for added protection and durability. They strike the perfect balance between affordability and long-term reliability.
Setup Process:
- Choose a level surface like a driveway, gravel pad, or concrete slab.
- Assemble the metal frame following the manufacturer’s instructions.
- Attach the roof panels, ensuring they are securely fastened and overlap properly.
- Anchor the structure to the ground using the included kits for wind protection.
Pros:
- Strong and weather-resistant
- Easy to assemble with basic tools
- Requires little maintenance
- Expandable and modifiable
Cons:
- Limited side protection unless upgraded
- Requires adequate space for installation
- May need a permit depending on local codes
A carport kit is an ideal RV shelter for those looking for a cost-effective, ready-made solution with lasting durability. It’s especially suited for year-round coverage and can be upgraded over time with side walls, enclosures, or storage add-ons—making it a smart investment for any RV owner.
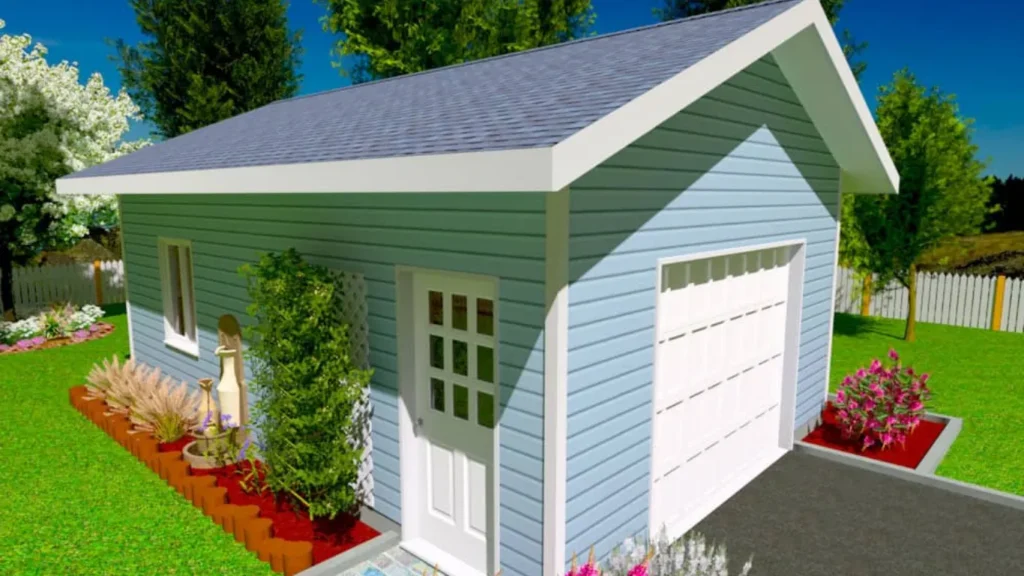
3. DIY Wood Pole Barn
3. DIY Wood Pole Barn
Cost Range: $800–$2000
Best For: Long-term, customizable shelter with strong weather resistance
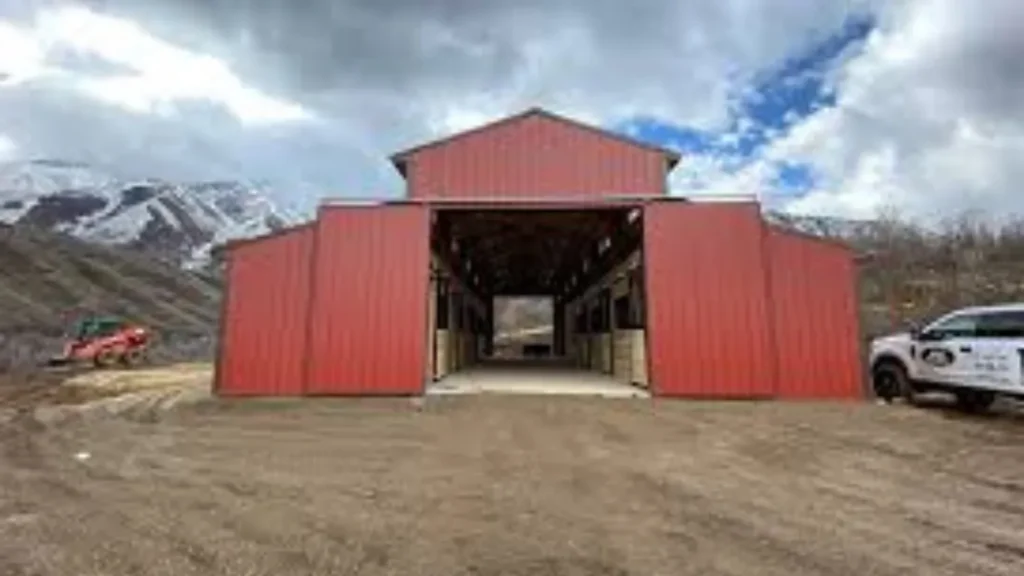
A DIY wood pole barn is a sturdy, semi-permanent shelter built using pressure-treated wood poles, beams, and a metal or polycarbonate roof. This traditional structure offers excellent protection against sun, rain, snow, and wind—making it one of the most durable and customizable cheap RV shelter options for homeowners with space and basic carpentry skills.
Pole barns can be open-sided, partially enclosed, or fully enclosed, depending on your needs and budget. While building it requires more time and labor than a tarp or tent structure, it will last for years with minimal maintenance.
How to Build:
- Plan and measure based on your RV’s dimensions and clearance needs.
- Install pressure-treated wood poles (either directly into the ground or using concrete footings).
- Add horizontal beams and trusses for the roof support.
- Install roofing material (corrugated metal or polycarbonate sheets).
- Optional: Add side panels, walls, or even sliding doors.
Pros:
- Highly durable and weather-resistant
- Customizable to any RV size or design
- Adds long-term property value
- Can double as storage or workshop space
Cons:
- Requires tools and carpentry knowledge
- More labor-intensive than prefab shelters
- May need building permits depending on location
A DIY wood pole barn is a fantastic option if you’re looking for a dependable, long-lasting shelter and are comfortable with basic construction. It’s a worthwhile investment that combines functionality, flexibility, and classic outdoor utility—all without the steep costs of pre-built RV garages.
4. Shade Sail Canopy
4. Shade Sail Canopy
Cost Range: $50–$200
Best For: Affordable sun protection in mild weather regions
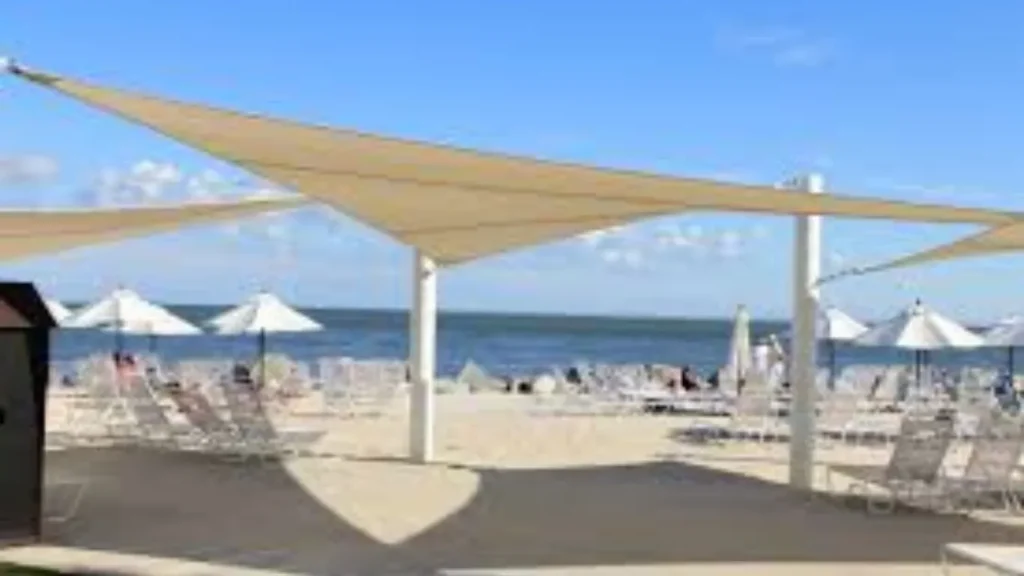
A shade sail canopy is one of the most budget-friendly and visually appealing ways to shield your RV from direct sunlight. These large, triangular or rectangular fabric panels are stretched between anchor points—like poles, walls, or trees—to create a shaded area over your RV. While they don’t offer full protection from rain or snow, they are ideal for UV protection, reducing heat buildup inside your RV, and preventing sun-related wear and tear.
Shade sails are a great temporary or supplementary option for RV owners who live in sunny, dry climates or need an easy-to-install solution for short stays.
Setup Tips:
- Use UV-resistant, waterproof fabric for longer life
- Anchor securely to avoid flapping or collapse during wind
- Tilt the sail to allow water runoff and prevent sagging
- Consider multiple sails to cover larger areas
Pros:
- Very inexpensive
- Modern and stylish look
- Quick installation and removal
- Customizable size and layout
Cons:
- Limited weather protection (not suitable for heavy rain, snow, or wind)
- Provides only overhead cover—no side protection
- Fabric may fade or stretch over time
A shade sail canopy is perfect for RVers who want a low-cost, no-fuss solution to block the sun. While it may not be a complete shelter, it’s a great starting point or supplementary option when used alongside tarps or portable side panels.
5. Canvas Tent Shelter
5. Canvas Tent Shelter
Cost Range: $200–$600
Best For: Temporary or seasonal RV protection with full coverage
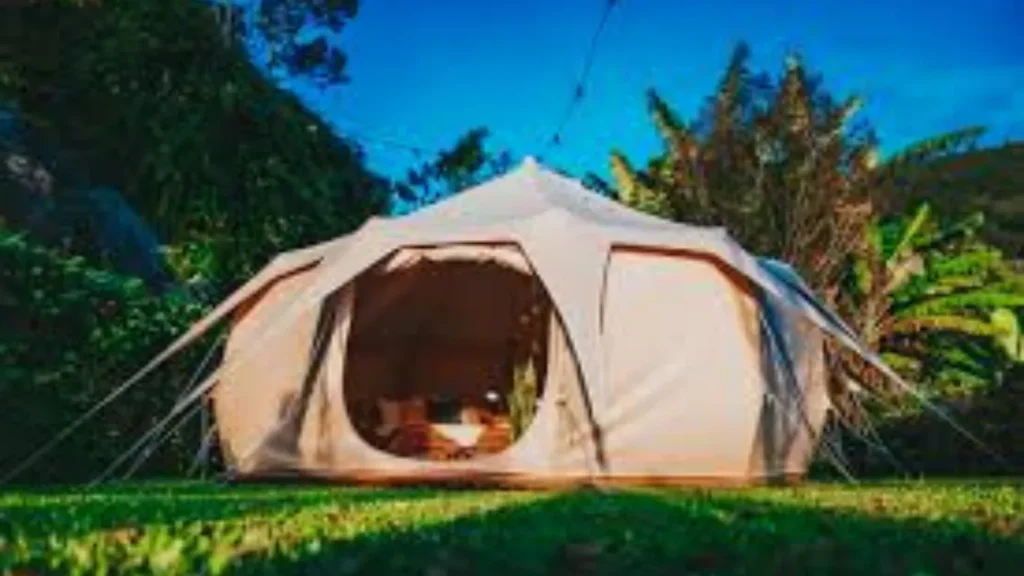
A canvas tent shelter is a versatile and affordable solution for RV owners who need reliable protection from the elements but don’t want to commit to a permanent structure. These shelters are often used for car storage or outdoor events and can be repurposed to house an RV with minimal modification. The frame is typically made of steel or aluminum, and the covering is a heavy-duty canvas or polyethylene fabric that provides full enclosure.
This type of shelter is great for those who move their RV frequently or park it temporarily on different properties.
What to Look For:
- Water-resistant, UV-protected canvas material
- Roll-up or zippered doors for easy access
- Ventilation flaps or windows
- Reinforced seams and anchors for stability
Pros:
- Portable and easy to assemble
- Provides full enclosure—roof and sides
- Great for renters or temporary use
- Often doesn’t require permits
Cons:
- Less durable in extreme weather
- May wear over time or develop leaks
- Requires regular inspection and maintenance
A canvas tent shelter offers a flexible, cost-effective way to keep your RV protected from the sun, rain, dust, and even light snow. If you’re looking for a temporary, enclosed option that can move with you, this shelter is an excellent choice without the high price tag of custom structures.
6. Recycled Greenhouse Frame

6. Recycled Greenhouse Frame
Cost Range: $0–$500 (depending on materials)
Best For: Eco-conscious DIYers and budget builders
A recycled greenhouse frame is a creative, sustainable, and cost-effective way to build an RV shelter. Old greenhouses—especially those with metal or PVC frames—can be repurposed to create a custom-fit canopy or carport-style shelter for your RV. All you need to do is reinforce the structure and swap out the original greenhouse plastic for a more durable tarp, corrugated panels, or weatherproof fabric.
You can often find used greenhouse frames for free or cheap through local classifieds, online marketplaces, or farm auctions.
How to Convert:
- Remove any damaged or rotted parts from the old greenhouse frame.
- Stabilize the frame using cross-bracing or concrete footers.
- Cover the top and sides with UV-resistant tarp, corrugated metal, or polycarbonate sheets.
- Add anchors or weights to keep the shelter secure in wind.
Pros:
- Low-cost, especially if upcycled
- Eco-friendly and sustainable
- Unique, custom-built design
- Fun DIY project for handy homeowners
Cons:
- Requires creativity and repair work
- Not a standard fit for all RVs
- Limited availability depending on your area
A recycled greenhouse frame shelter is perfect for the DIY enthusiast who enjoys turning old into new. With a little effort and imagination, you can transform discarded materials into a functional RV shelter—saving money while reducing waste.
7. Steel Tube Car Shelter
7. Steel Tube Car Shelter
Cost Range: $300–$1000
Best For: RV owners seeking a durable, semi-permanent shelter without the cost of a full garage
A steel tube car shelter offers a strong and stable structure made from galvanized steel tubes and a heavy-duty polyethylene or PVC fabric cover. Designed to handle various weather conditions, this type of shelter is perfect for year-round use and can be installed in your yard, driveway, or open lot.
Steel tube shelters are available in RV-specific sizes and are easier to assemble than fully enclosed metal buildings, making them an excellent mid-range solution for protecting your RV from sun, rain, hail, and snow.
Key Features:
- Galvanized or powder-coated steel frame to prevent rust
- UV-resistant, waterproof fabric
- Optional side panels or front zippered doors
- Anchoring kits for added wind resistance
Pros:
- More durable than PVC or tarp-based shelters
- Stable and weather-resistant
- Available in a range of sizes
- Suitable for long-term outdoor use
Cons:
- Assembly can be time-consuming
- More expensive than tarp or PVC alternatives
- Bulky—requires a level installation area
A steel tube car shelter provides excellent value for its durability and protection. It’s especially ideal for RV owners in areas with moderate to harsh weather who want a reliable, cost-effective alternative to permanent buildings. With proper anchoring and maintenance, this shelter can serve your RV needs for many years.
8. Driveway Portable Garage
8. Driveway Portable Garage
Cost Range: $250–$700
Best For: Homeowners needing flexible, full-coverage protection
A driveway portable garage is a prefabricated, tent-style structure designed to provide all-around protection for vehicles—including RVs. These shelters typically come with a steel or aluminum frame and a weather-resistant polyethylene or canvas cover, offering coverage on the top and all sides.
Because they’re non-permanent and freestanding, they’re perfect for renters or homeowners who can’t build permanent structures due to zoning or HOA restrictions. They’re also easy to disassemble and relocate as needed.
Features to Look For:
- UV-resistant and waterproof fabric
- Anchoring kits for wind resistance
- Zippered or roll-up front doors
- Ventilation windows to prevent mold and mildew
Pros:
- Quick to install and remove
- Offers full enclosure from sun, rain, and dust
- Ideal for driveways or level surfaces
- No permits usually required
Cons:
- Less durable than metal shelters
- Susceptible to damage in high winds or snow loads
- May need replacement covers over time
A driveway portable garage is a great choice for those who want complete RV protection without permanent construction. It’s practical, versatile, and easy to maintain—making it one of the most convenient and affordable options for RV storage on your property.
9. Under-Deck or Patio Shelter
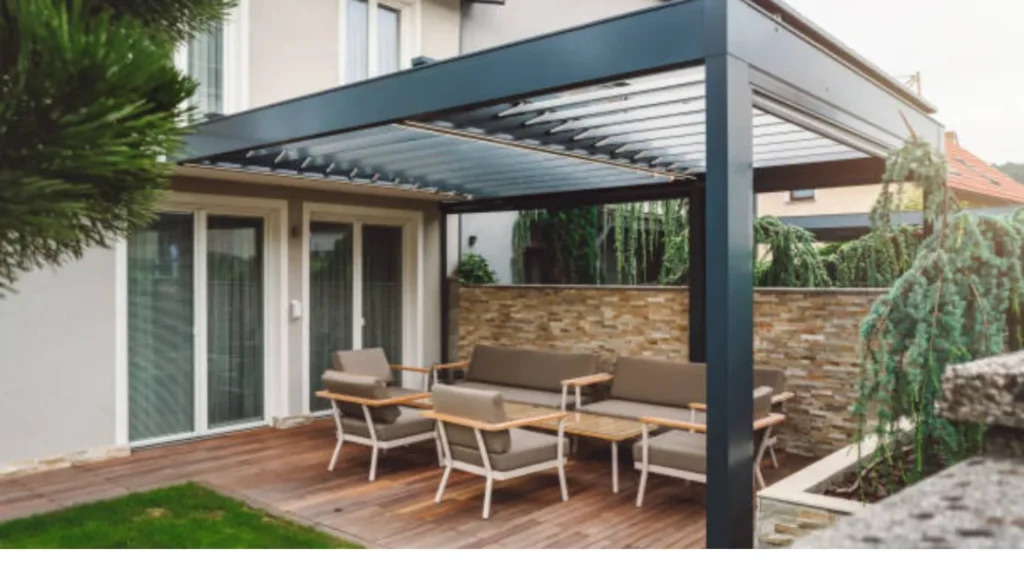
9. Under-Deck or Patio Shelter
Cost Range: Minimal (if the structure already exists)
Best For: Homeowners utilizing existing vertical space
If your property has a raised deck, stilted patio, or carport extension, you might already have the foundation for a perfect low-cost RV shelter. Parking your RV under a deck or patio overhang provides shade, rain protection, and partial coverage from environmental elements—all without building a new structure from scratch.
With a few enhancements—like adding side tarps, lattice panels, or roll-up curtains—you can turn an open space into a weather-resistant haven for your RV.
How to Maximize the Space:
- Measure your RV’s height and width to ensure it fits under the structure.
- Add sidewalls or roll-down tarps for wind and rain protection.
- Use waterproof decking to reduce drip-through from above.
- Install drainage or gutters if water runoff is a concern.
Pros:
- Extremely cost-effective if space is already available
- Uses underutilized areas
- Blends well with home aesthetics
- Can double as additional storage or work area
Cons:
- Limited space or height clearance
- Only works if you already have a raised deck or similar structure
- May require minor modifications
An under-deck or patio shelter is one of the most resourceful RV protection ideas for homeowners. It makes excellent use of existing architecture and can be easily adapted for extra weather protection—all while costing next to nothing.
10. Corrugated Metal Roof Shelter
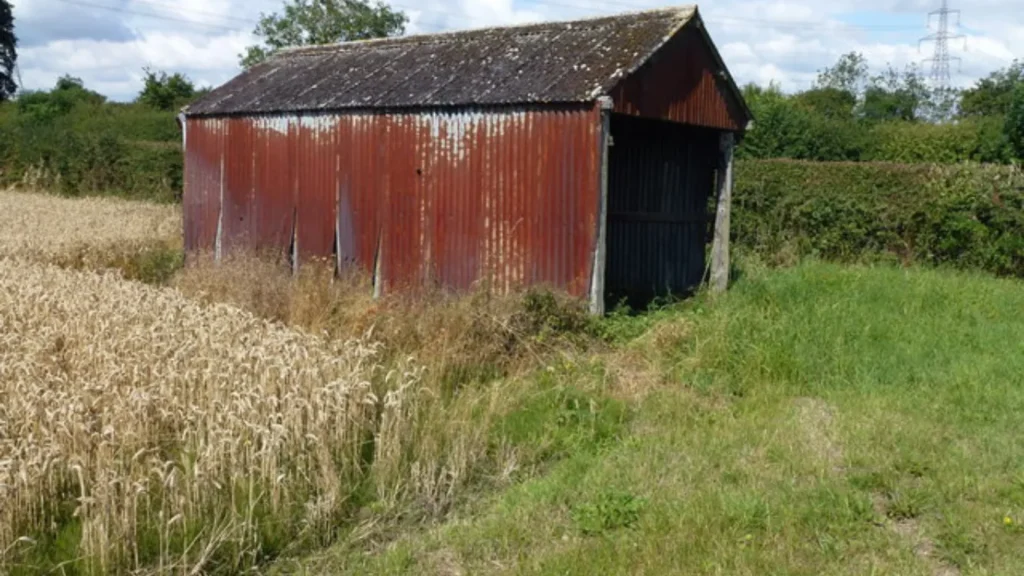
10. Corrugated Metal Roof Shelter
Cost Range: $600–$1800
Best For: Long-term, durable, weather-resistant protection
A corrugated metal roof shelter is a robust and budget-conscious way to protect your RV from the elements. Using metal panels for the roof and a simple wood or metal frame, this shelter offers excellent defense against rain, snow, hail, and sun damage. It’s a step up from tarp or PVC structures in terms of durability and longevity, yet still much cheaper than a fully enclosed RV garage.
This type of shelter is ideal for RV owners living in areas with extreme weather conditions or those looking for a semi-permanent setup.
How to Build:
- Materials Needed:
- Pressure-treated wood or metal posts
- Corrugated galvanized steel or aluminum roofing sheets
- Screws, fasteners, and brackets
- Concrete (optional) for anchoring the posts
- Optional side panels for added protection
- Pressure-treated wood or metal posts
- Steps:
- Set up upright posts spaced according to your RV’s length
- Install cross beams for the roof frame
- Attach the corrugated sheets with proper overlaps
- Anchor the structure to the ground or a concrete base
- Set up upright posts spaced according to your RV’s length
Pros:
- Highly durable and long-lasting
- Great protection from all-weather elements
- Can be extended or enclosed later
- Increases property value
Cons:
- Requires tools and basic construction skills
- Might need permits in some areas
- Less portable than lightweight options
A corrugated metal roof shelter strikes the perfect balance between cost and performance. It’s ideal for RVers who plan to stay put for a while and want a solid structure that offers peace of mind without the premium price tag of a professionally built garage.
11. PVC Pipe Canopy Shelter
11. PVC Pipe Canopy Shelter
Cost Range: $100–$300
Best For: DIYers looking for a quick, low-cost shelter
A PVC pipe canopy shelter is one of the most affordable and beginner-friendly RV shelter ideas. Built using thick PVC pipes as the frame and a durable tarp for the cover, this structure offers basic protection against sun, light rain, and debris. It’s ideal for temporary or seasonal use, especially if you’re parking your RV for short periods.
The flexibility of PVC allows you to create a custom size tailored to your RV’s dimensions, and the lightweight material makes assembly and disassembly relatively easy.
How to Build:
- Materials Needed:
- 1.5″ or 2″ schedule 40 PVC pipes
- T-joints, elbows, and connectors
- Heavy-duty UV-resistant tarp
- Bungee cords or zip ties
- Ground anchors or sandbags for stability
- 1.5″ or 2″ schedule 40 PVC pipes
- Steps:
- Build the rectangular frame (width, length, height)
- Add roof support beams for strength
- Drape the tarp over the top and sides
- Secure the tarp tightly using bungees or cords
- Anchor the base to the ground to avoid tipping
- Build the rectangular frame (width, length, height)
Pros:
- Very inexpensive and customizable
- Lightweight and portable
- Perfect for short-term RV parking
- Great for learning basic DIY construction
Cons:
- Not suitable for high wind or heavy snow
- May require reinforcement for stability
- Shorter lifespan compared to metal structures
A PVC pipe canopy shelter is a great choice for anyone who wants a fast and affordable solution to shield their RV. Just make sure to reinforce the frame and check it regularly for wear and tear, especially in areas with unpredictable weather.
12. Used or Second-Hand Carport
12. Used or Second-Hand Carport
Cost Range: $100–$700
Best For: Budget-savvy RV owners who don’t mind a little DIY
Buying a used or second-hand carport is one of the smartest ways to get a quality RV shelter at a fraction of the cost. Many homeowners sell their carports after remodeling, upgrading, or moving. These structures can often be found in good condition on platforms like Craigslist, Facebook Marketplace, OfferUp, and local classifieds.
You’ll typically find metal frame carports or canvas-covered canopies, and sometimes even full steel kits. Make sure to measure your RV and confirm the dimensions of the carport before purchasing.
Tips for Success:
- Inspect thoroughly for rust, damage, or missing parts.
- Ask the seller for an instruction manual or assembly guidance.
- Arrange a truck or trailer for pickup—disassembled carports can be bulky.
- Reinforce or modify if needed to ensure it fits your RV’s height and length.
Pros:
- Significant savings compared to buying new
- Eco-friendly reuse of existing materials
- Available in various styles and sizes
Cons:
- Limited local availability
- May require disassembly, transport, and some repairs
- No warranty or return policy
A used carport can be a goldmine for DIYers or anyone looking to protect their RV on a tight budget—just be prepared to do a little extra work to make it fit your space perfectly.
Final Thoughts
You don’t need to spend thousands to protect your RV from the elements. These 12 cheap RV shelter ideas offer a wide range of solutions—whether you’re a DIY enthusiast, a minimalist, or someone looking for semi-permanent coverage. With a little creativity and effort, you can build a safe haven for your mobile home without burning a hole in your pocket.