The Fourth of July is more than just fireworks and barbecues—it’s also a perfect excuse to show off your patriotic side with some festive nail art! Whether you’re attending a backyard party, watching the fireworks, or just want to feel festive, these 15 Fourth of July nail designs will help you celebrate America’s birthday in style.
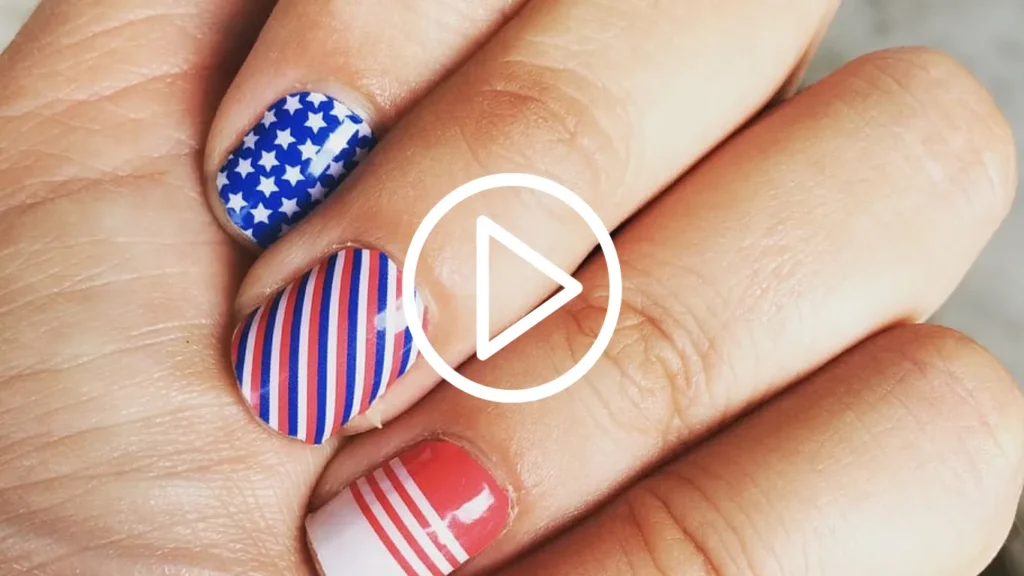
1. Classic Stars and Stripes
Nothing says 4th of July like red, white, and blue stripes paired with tiny white stars. Alternate the design on each nail for a fun, flag-inspired look.
Classic Stars and Stripes
Celebrate America in the most iconic way—with nails that mimic the U.S. flag! This timeless design features bold red and white stripes paired with deep blue and white stars. You can alternate the patterns across your nails or dedicate specific fingers to stars and others to stripes for a balanced look.
How to Get the Look:
- Paint half your nails with red and white horizontal stripes using striping tape or a thin nail brush.
- Use a dark blue base on the rest and add small white stars using a dotting tool, star stencil, or nail stickers.
- Finish with a glossy topcoat for a clean, polished finish.
Perfect For:
Those who love traditional patriotic vibes with a neat and recognizable design.
Style Tip:
Add a touch of silver glitter between the stripes for a festive shimmer that catches the light during fireworks!
2. Firework Sparkle Nails
Create mini fireworks on a navy blue or black base using silver and white polish. Add a touch of glitter for that extra sparkle.
Firework Sparkle Nails
Bring the night sky to your fingertips with Firework Sparkle Nails! This dazzling design captures the excitement of fireworks bursting on the Fourth of July with glittering polish and colorful spark lines.
How to Get the Look:
- Start with a dark base—navy blue, black, or deep purple work beautifully.
- Use fine nail brushes or toothpicks to draw firework bursts in red, white, silver, and blue radiating from a central point.
- Add sparkles or holographic glitter polish to mimic the shimmer of real fireworks.
- Seal it with a high-gloss topcoat to make everything pop.
Perfect For:
Evening events and watching fireworks under the stars.
Style Tip:
Use glow-in-the-dark or holographic glitter polish to add a magical effect when the lights go out!
3. Ombre Red, White & Blue
Blend red, white, and blue into a smooth gradient across your nails. It’s sleek, modern, and oh-so-patriotic.
Ombre Red, White & Blue
For a soft and stylish patriotic vibe, go for Ombre Red, White & Blue nails. This design blends America’s signature colors into a seamless gradient, giving your nails a modern and sophisticated edge.
How to Get the Look:
- Use a makeup sponge to layer red, white, and blue polishes side-by-side.
- Dab the sponge onto each nail to transfer the gradient, repeating a few times for intensity.
- Clean up the edges with a brush dipped in nail polish remover for a tidy finish.
- Top it off with a clear, glossy coat to smooth the blend and enhance shine.
Perfect For:
Anyone looking for a trendy and chic take on classic patriotic nails.
Style Tip:
Add a subtle touch of silver glitter or a small star decal on one or two nails to elevate the look without overwhelming the gradient.
4. American Flag Accent Nail
Paint most of your nails in a solid red or blue, then add a detailed American flag design on one accent nail to make a statement.
American Flag Accent Nail
Make a bold patriotic statement with an American Flag Accent Nail. This design allows you to keep most of your nails simple while dedicating one finger—usually the ring finger—to a mini version of the U.S. flag.
How to Get the Look:
- Paint most of your nails in a solid red or blue shade.
- On your accent nail, use a white base coat.
- Carefully add red stripes using a thin brush or striping tape.
- Paint a small blue square in the top corner and use a dotting tool or white nail pen to create tiny stars.
- Finish with a glossy topcoat for a crisp, clean flag look.
Perfect For:
Those who want a standout nail without going all-out on every finger.
Style Tip:
You can also flip the design—use red nails all around and make the accent nail glittery blue with white stars for a unique twist.
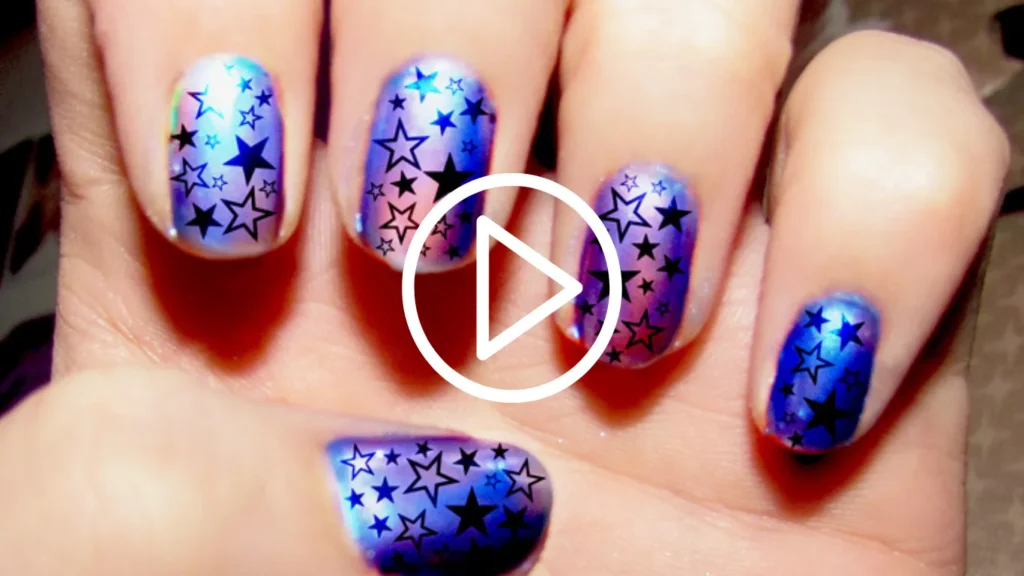
5. Star-Spangled Glitter Nails
Use a glitter polish with tiny stars over a blue or red base coat for an easy yet festive touch.
Star-Spangled Glitter Nails
Bring sparkle and shine to your Fourth of July look with Star-Spangled Glitter Nails. This festive style combines the glitz of glitter with patriotic stars to create a fun, eye-catching design that’s perfect for any celebration.
How to Get the Look:
- Choose a bold base color—navy blue or deep red works great.
- Apply a layer of glitter polish that includes red, white, or blue flecks.
- Add tiny white or silver star stickers or nail art decals for that star-spangled effect.
- Seal everything in with a high-shine topcoat to lock in the sparkle and prevent chipping.
Perfect For:
Firework shows, BBQs, or anyone who loves a little glam with their patriotism.
Style Tip:
Use a clear or nude base on a couple of nails to make the glitter and stars pop even more—this creates a balanced yet dazzling manicure.
6. Matte Patriotic Nails
For a trendy twist, go matte! Use matte versions of red, white, and blue polish and add a small star or flag detail to finish the look.
Matte Patriotic Nails
If you’re a fan of understated elegance, Matte Patriotic Nails are your go-to Fourth of July design. This look swaps the typical glossy finish for a soft, velvety matte, giving your red, white, and blue nails a chic, modern edge.
How to Get the Look:
- Paint your nails with solid patriotic shades—classic red, white, and navy blue.
- Once dry, apply a matte topcoat for that smooth, shine-free finish.
- Add minimal details like a single white star, a thin stripe, or a color block for subtle flair.
Perfect For:
Anyone who prefers minimalist nail art with a trendy twist.
Style Tip:
Combine matte and glossy finishes for contrast—try matte nails with one glossy accent nail featuring glitter or foil stars.
7. Marble Swirl Freedom Nails
Blend red, white, and blue into a marble swirl pattern that mimics fireworks or smoke trails—each nail becomes a mini celebration.
Marble Swirl Freedom Nails
Channel the energy of fireworks and freedom with Marble Swirl Freedom Nails. This artsy, fluid design mimics swirling smoke trails and vibrant explosions in red, white, and blue, giving your nails a unique and eye-catching flair.
How to Get the Look:
- Start with a white or light base.
- Use a water marble technique: drop red, blue, and white polish into a cup of water, swirl with a toothpick, and dip your nail in.
- Alternatively, drag the colors directly on your nail with a thin brush for a hand-painted marble effect.
- Clean up the edges and finish with a glossy topcoat for a smooth, glass-like finish.
Perfect For:
Creative souls who want a one-of-a-kind nail design that captures the festive spirit.
Style Tip:
Add metallic streaks (silver or gold) within the swirls for a glam firework-inspired touch.
8. French Tip with a Twist
Give the traditional French manicure a patriotic makeover with red tips, a blue base, and white star embellishments.
French Tip with a Twist
Give the classic French manicure a patriotic makeover with the French Tip with a Twist design. It’s elegant, simple, and still shows off your festive spirit in a subtle and stylish way.
How to Get the Look:
- Start with a clear or nude base coat.
- Paint the tips of your nails in red or blue instead of the traditional white.
- Add a thin white line below the colored tip or draw tiny stars on one or two tips for extra flair.
- Finish with a matte or glossy topcoat based on your preferred finish.
Perfect For:
Those who love minimalism but still want to rock the red, white, and blue in a chic way.
Style Tip:
Try alternating red and blue tips across your fingers, or go ombre on the tips to add more dimension.
9. Negative Space Stars
Leave parts of your nail bare and use tape or nail stickers to create clean-cut star shapes with red, white, or blue polish.
Negative Space Stars
For a trendy and modern Fourth of July manicure, Negative Space Stars offer a clean, edgy look. This design uses the natural nail as part of the art, leaving star-shaped cutouts or outlines that let your nail breathe while still being totally festive.
How to Get the Look:
- Apply a base coat to protect your nails.
- Use star-shaped nail stickers or stencils on bare nails, then paint over them with red, white, or blue polish.
- Carefully peel off the stickers to reveal the negative space stars underneath.
- Finish with a clear topcoat to seal the design and add shine.
Perfect For:
Minimalists or anyone looking for a non-traditional, fashion-forward Fourth of July manicure.
Style Tip:
Pair this design with metallic outlines or tiny dots for a galaxy-inspired twist on patriotic nail art.
10. Confetti Glitter Bomb
Add chunky red, white, and blue glitter to clear or nude nails for a fun confetti-style effect that screams party time.
Confetti Glitter Bomb
If you’re ready to party, the Confetti Glitter Bomb nail design is for you! Packed with vibrant sparkle, this look mimics the energy of confetti cannons and fireworks bursting in the sky—a perfect match for Fourth of July celebrations.
How to Get the Look:
- Start with a clear or light nude base coat.
- Apply a chunky red, white, and blue glitter polish across the entire nail or just at the tips for a “confetti-dipped” effect.
- Layer for more intensity, then seal with a thick, glossy topcoat to keep the glitter smooth and long-lasting.
Perfect For:
Party-goers, parade-watchers, or anyone who loves bold, festive nail art.
Style Tip:
Mix different sizes of glitter or add star-shaped glitter pieces to enhance the explosion of color and texture.
11. Navy Blue with Silver Stars
Keep it simple but striking with a deep navy base and tiny silver star decals or stickers. Perfect for both short and long nails.

Navy Blue with Silver Stars
For a simple yet stunning look, Navy Blue with Silver Stars nails channel the beauty of a starry Fourth of July night. This design is elegant, patriotic, and super easy to recreate at home.
How to Get the Look:
- Paint your nails with a deep navy blue polish.
- Apply small silver star stickers, decals, or use a dotting tool with silver polish to create tiny star shapes.
- You can scatter the stars randomly or arrange them in neat patterns for a clean design.
- Seal with a glossy or matte topcoat depending on your style.
Perfect For:
Those who want a classy, understated Fourth of July manicure with just the right amount of sparkle.
Style Tip:
Add a touch of silver glitter along the cuticle line or at the tips for a celestial sparkle effect.
12. Patriotic Tie-Dye
Try a retro vibe with tie-dye nail art using America’s favorite three colors. Add a glossy topcoat to enhance the design.
Patriotic Tie-Dye
Bring retro summer vibes to your nails with Patriotic Tie-Dye. Inspired by classic tie-dye t-shirts, this nail design swirls red, white, and blue into a playful and colorful celebration of Independence Day.
How to Get the Look:
- Start with a white base coat on each nail.
- Use a thin brush or a dotting tool to apply small dots or swirls of red and blue polish while the base is still slightly tacky.
- Drag a toothpick or nail art brush from the center outward to create a spiral tie-dye effect.
- Finish with a glossy topcoat to bring the design together and lock in the color.
Perfect For:
Festival lovers, beach-goers, or anyone who loves a fun and funky holiday look.
Style Tip:
Make each nail a little different for an authentic tie-dye feel, or stick to uniform spirals for a more polished version.
13. Polka Dot Party
Use a dotting tool or toothpick to create red, white, and blue polka dots over a neutral or contrasting background.
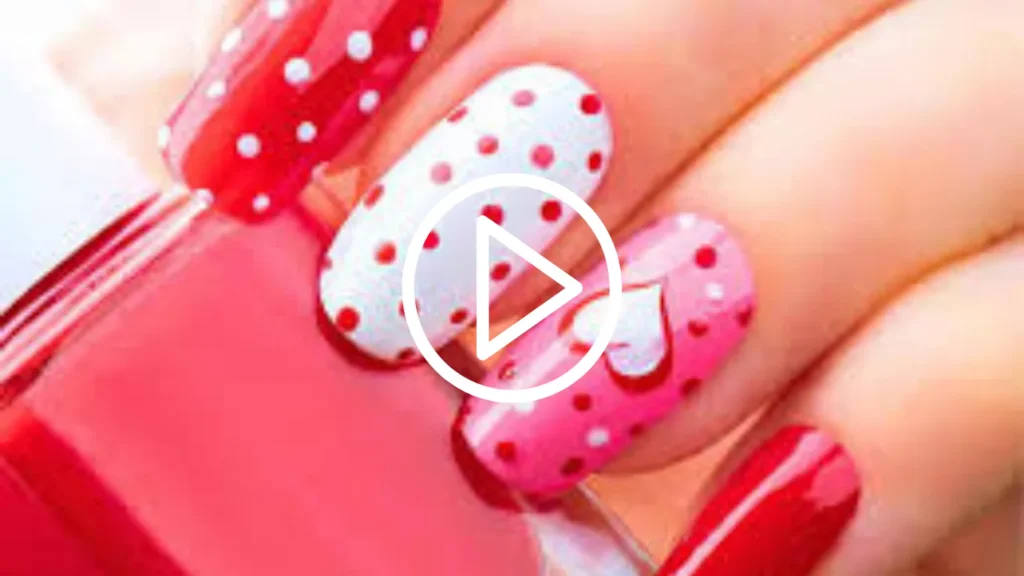
Polka Dot Party
Looking for something playful and easy? Polka Dot Party nails are festive, fun, and quick to do—perfect for adding a touch of cheer to your Fourth of July outfit without needing pro-level skills.
How to Get the Look:
- Start with a neutral or white base coat.
- Using a dotting tool, toothpick, or bobby pin, create red, blue, and white dots across each nail.
- Mix up the dot sizes for a more dynamic and bubbly look.
- Keep the placement random or go for a neat polka dot grid—either way, it’s super cute.
- Finish with a topcoat to keep the dots crisp and long-lasting.
Perfect For:
Beginners, kids, or anyone who loves lighthearted, low-effort nail art.
Style Tip:
Add a few metallic or glitter dots for extra sparkle, or use a matte topcoat for a trendy, soft finish.
14. USA Lettering Nails
Spell out “USA” across your nails with bold letters and fill in the remaining fingers with patriotic designs or glitter.

USA Lettering Nails
Make a bold patriotic statement with USA Lettering Nails! This design spells out your American pride loud and clear—literally—by featuring the letters U-S-A across your fingertips in stylish fonts and festive colors.
How to Get the Look:
- Paint your nails with a solid red, white, or blue base.
- Choose three nails (often the index, middle, and ring) and use a nail art brush, stencil, or letter decals to paint one letter of “USA” on each.
- Decorate the remaining nails with stars, glitter, stripes, or leave them solid for a cleaner look.
- Finish with a shiny or matte topcoat to seal the design.
Perfect For:
Those who want their Fourth of July nails to be bold, graphic, and totally Instagram-worthy.
Style Tip:
Use metallic or holographic polish for the letters to make them pop, or outline them with tiny rhinestones for an extra wow factor.
15. Mixed Media Mani
Combine textures like matte, glitter, and chrome finishes in red, white, and blue for a bold, artistic Fourth of July look.
Mixed Media Mani
Can’t choose just one design? Go for the Mixed Media Mani—a bold, creative approach that combines multiple textures, patterns, and finishes in red, white, and blue for a one-of-a-kind patriotic look.
How to Get the Look:
- Paint each nail with a different design—think stars on one, stripes on another, glitter on one, ombré or matte on the next.
- Use a mix of finishes like glossy, matte, metallic, and glitter polishes.
- Accent with nail decals, rhinestones, or foil for added texture and sparkle.
- Keep the color palette cohesive (red, white, blue, silver) so the variety still feels united.
Perfect For:
Creative nail lovers and anyone who wants to show off a full Fourth of July nail art showcase.
Style Tip:
Stick to 2–3 nail art techniques to avoid overdoing it—balance is key to keeping this eclectic look polished.
Final Thoughts
With so many creative options, there’s no excuse for boring nails this Independence Day. Whether you DIY at home or visit your favorite nail artist, these Fourth of July nail designs are guaranteed to turn heads and add a festive flair to your look.
Which design will you be rocking this July 4th? Let us know in the comments!